


All of us want our sensitive information to be hidden from people and for that we perform different kinds of things like hide those files or lock them using different softwares. But even though we do that, those files attractive people to itself as an object of security. Today I'm going to give you a slight introduction to what is called as Steganography. Its a practice of hiding an informational file within another file like you might have seen in movies an image has a secret message encoded in it. You can read more about Steganography from Wikipedia.
In this tutorial I'm going to use a tool called steghide, which is a simple to use Steganography tool and I'm running it on my Arch Linux. What I'm going to do is simply encode an image with a text file which contains some kind of information which I don't want other people to see. And at the end I'll show you how to decode that information back. So lets get started:
Requirements:
1. steghide
2. a text file
3. an image file
After you have installed steghide, fire up the terminal and type steghide

It will give you list of options that are available.
Now say I have a file with the name of myblogpassword.txt which contains the login password of my blog and I want to encode that file into an Image file with the name of arch.jpg so that I can hide my sensitive information from the preying eyes of my friends. In order to do that I'll type the following command in my terminal:
steghide embed -ef myblogpassword.txt -cf arch.jpg

here steghide is the name of the program
embed flag is used to specify to steghide that we want to embed one file into another file
-ef option is used to specify to steghide the name (and location, in case if its in some other directory) of the file that we want to embed inside of the another file, in our case its myblogpassword.txt
-cf option is used to specify the name (and location, in case if its in some other directory) of the file in which we want to embed our file, in our case its an image file named arch.jpg
After typing the above command and hitting enter it will prompt for a password. We can specify a password here in order to password protect our file so that when anyone tries to extract our embedded file, they'll have to supply a password in order to extract it. If you don't want to password protect it you can just simply hit enter.
Now myblogpassword.txt file is embedded inside of the image file arch.jpg. You'll see no changes in the image file except for its size. Now we can delete the plain password text file myblogpassword.txt.
In order to extract the embedded file from the cover file, I'll type following command in the terminal:
steghide extract -sf arch.jpg -xf myblogpass.txt
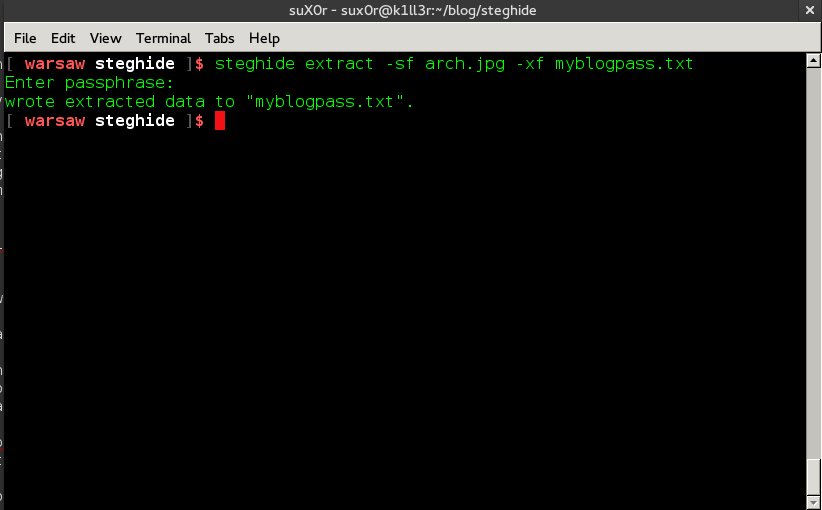
here steghide is again name of the program
extract flag specifies that we want to extract an embedded file from a stego file
-sf option specifies the name of the stego file or in other words the file in which we embedded another file, in our case here its the arch.jpg file
-xf option specifies the name of the file to which we want to write our embedded file, here it is myblogpass.txt
(remember you must specify the name of file with its location if its somewhere else than the current directory)
After typing the above command and hitting enter, it will prompt for a password. Supply the password if any or otherwise just simply hit enter. It will extract the embedded file to the file named myblogpass.txt. Voila! you got your file back but yes the image file still contains the embedded file.
That's it, very easy isn't it?
It was a pretty basic introduction you can look for other things like encrypting the file to be embedded before you embed it into another file and so on... enjoy :)
0 comments:
Post a Comment